Panda's at it again! Now with moving cameras!
Text:
Moving Camera Tutorial
Step 1. Record any action the way you normally would.
Step 2. Rightclick on your shot in the sequence timeline and press 'Set new camera'
Step 3. Click on the camera selector (Work Camera/Active camera button) above the viewport.
Step 4. Now we record the path for your camera by moving as you would normally record action. (Sometimes it's recommended that you tick the "Noclip" option before you start the recording).
Step 5. Move about.
Step 6. Press Esc when you're done your camera-ing.
Step 7. Rightclick on the Shot in the timeline. Hit "New Animation Set", and select the camera you used for the recording.
Step 8. Open the Animation Set Editor, and press the red circle.
Step 9. Now you'll see a shit-ton of lines everywhere on your timeline, and a bar around your time-mover-thingy.
Step 10. Drag the right side of bar out (this part is still somewhat confusing to me, I'll have to play around with it some more to figure it out 100%) to the end of your shot.
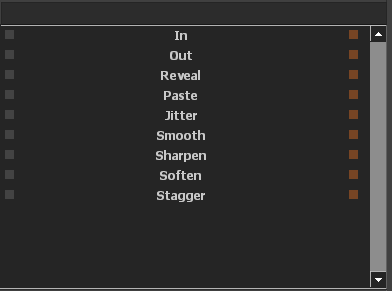
Step 11. You can add effects like smoothing, jittering, etc. by grabing the sliders:

Step 12. Play around with it for a while, do a lot of test shots before trying anything in a film.
Step 13. Press the Green Arrow to quit the edit-thing mode.
Step 14. Right click on your shot > Zoom in
Step 15. Make sure you're all the way at the beginning of your clip's timeline.
Step 16. Un-tick "Take 1" (or which ever take your camera happened to be) and this will stop your arms from floating around with the camera. (If someone knows how to hide the view model, please tell me)
Step 17. Right click on the clip, and Zoom out.
Now you should have a fairly decent shot to use for your movies. Just be mindful, when you Un-tick the Camera's take, your arms will still be there, at the exact moment in the time line where you un-ticked it. So just make sure your final shots won't be looking the same direction as where you started the clip. (You can see your floating arms through walls too
.jpg)

dicks out for harambe
ReplyDelete